How to live stream: the ultimate guide Blog
The first step usually is the most difficult. Where do you begin? There are many ways to get started. In this article, we will give you the information on what you need to know before starting your first venture.
Once you've completed this article right now, you'll understand how live stream and the best technology available to anyone with a budget and also the many streams to assist to find the perfect location to get the most effective live stream.
In this article
- Starts with live streaming
- How do you live stream live on the for the first time?
- Five methods to increase the bandwidth of your connection on internet to stream live
What steps must be taken for streaming live?
Before we dive into the streaming system , we must be able to examine the content first.
There are a lot of professional multi-camera shows over the globe, but it doesn't mean that it's necessary to break the bank to start. Make sure that the equipment you use as well as the setup will only allow you to travel many kilometers, and the most crucial aspect is the content.
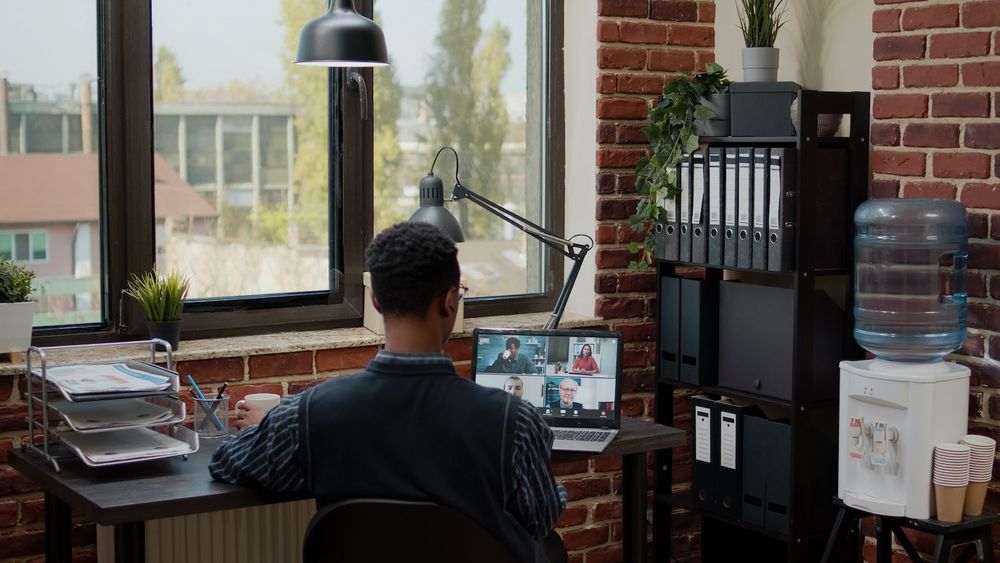
Take a moment to think about the last video call you had with friends and loved ones. Maybe it was a time for catching up or shared a meal. Like your previous live video chat, live streaming also has the same goal, which is to make connections in a natural and comfortable manner.
How can you livestream your first time?
This is a list of equipment you'll need prior to beginning live streaming:
- Audio input
- Camera input
- The encoder as well as the switcher
- Internet bandwidth
- Live streaming platform
Live streaming Conditions
To proceed in the right direction, we need to be familiar with a couple of words you'll have to know with. This is only the beginning of the iceberg to aid you in understanding streams of language at first.
- Bitrate The speed of moving of data between two locations. It's usually expressed by kilobytes/second. The measurement can vary in line with various variables, such as sources and connectivity to networks and receivers, as well as video compression. Also, the resolution, and other variables.
- Compression in the stream improves effectiveness by decreasing the amounts of data that the streaming video has. The most common standard in the industry for this is H.264 (better known as MPEG-4). uses this compression for the streaming of live video as well as uploads.
- Coding , also known as Transcoding in the moment that video footage is recorded to the first time it is available in many formats dependent on the gadget. Coding, also referred to as transcoding, refers to the process of changing raw, analog or broadcast video formats into digital video files.
- Frames A sequence of still photographs that comprise your video. Consider them like pages from the pages of an old book. The video has less movement throughout each frame. The greater the number of frames in a second the more smooth video. The measure is known as frames per second (FPS) that refers to the number of frames shown in a second video.
- Redundancy There's an array of choices for streaming backup streams live. Fully redundant live sets include the feeds from backup cameras, streams of backup data that come through the mixer's backup streams RTMP as well as various kinds of backup signals. backup encoders for each master feed and the backup stream or profile that playback. Backup CDNs for each stream that the stream is served from.
- Switcher can also be described as the "video mixer" or "vision mixer" Switchers are tools that allow users to select between various sources. In certain instances, they may be used to composit (mixing) videos to create distinctive effects.
1. Choose the camera you prefer along with the quality of the audio.
Take a look at the top options for setting your streaming up for novices. If you're seeking streaming without stress, you can use phones or webcams that have integrated cameras as a starting point.
Whatever audio or video configuration you choose to use, make sure that the audio and video broadcasts look stunning. It is all about following the guidelines below:
- Make sure you have a clean, appealing background
- Make sure that your speaker is in the center in the frame.
- You should ensure that there are lights inside the room, or you can use natural light which is right directly in front of you, and not behind you.
- Find a quiet place and block out the background sound
- Keep things as static as possible and restrict movement
If you're trying to boost the quality of your sound and image to a professional standard There are some fantastic suggestions to consider when it comes to the camera, lighting or audio.
Start-up guidelines: Camera: Mevo Start ($399) Microphone: Rode VideoMic ($150) The light: Aputure MC ($90)
Intermediate-level recommendations:
Camera: Canon XA15 ($1,800)
Microphone Rode ProCaster ($229)
Lighting Ring light kit made by Neewer's ($19-$110)
Professional-level recommendations:
Camera: PMW 300 ($7,500)
Microphone: Shure SM7B ($399)
Audio Mixer: RodeCaster Pro audio mixer ($599)
Lighting: Aputure300dii ($1,100)
2. Choose an encoder , after which you can switch.
When you've all your video and audio sources secure, you'll have to examine switchers and encoders.
Software encoders
A encoder is crucial to the dissemination of video. It is the device that process and transforms video's content into a format that is adaptable to various platforms such as Facebook, Youtube, Twitch etc., to ensure that users can view your videos on any platform.
Some cameras come with encoders, others need the usage of an external encoder (more on that in the following sections) or an encoder program.
What exactly is an encoder?
An encoder is a component of technology that is used to translate and convert video to formats compatible for various platforms like Facebook, Youtube, Twitch and many others.
In order to determine the best approach to pick a program encoder, it's important to examine three important factors.
- Ease-of-use
- Accessibility
- Evergreen software
Three of these components ensure you've got an encoder you can utilize with the required technical support.
Hardware encoders
Hardware encoders can be used to add the highest quality audio and video along with a wide range of cameras and video sources in your streaming.
If you're looking for the best equipment recommendations for the encoder in hardware, we've included everything you require. Below are the essential parts of the equipment required for the use of an (or greater) Studio HD550 switcher to be the primary encoder.
- AJA HD5DA HDSDI distribution amplifiers
- Datavideo DAC70 Up/Down/Cross Converter
- AJA HD10AMA Audio Embedder
- Netgear GS105 5-Port Network Switch
- 100' BNC and Cat 6 cables
- 3.0' Cat 6 and HD-SDI cables
Switchers
The primary purpose behind the function of a switcher is exactly what the name implies. It lets the creator alter the type of audio and video sources. This can be used for multi-camera sets-ups to ensure that you have the ability to switch between shots while streaming.
Like encoders, there are numerous alternatives available for switching between hardware and software. But, in the beginning of your journey it is recommended to select a program which combines all of the components required for encoding and switching.
Livestream Studio, which is the default software used for encoders and switchers, allows users to take advantage of the benefits in live control rooms which is able to tell engaging stories.
3. Check your internet bandwidth for live streaming
Now, we'll address the problem that's on the horizon and that's connectivity.
No matter how beautiful or elegant the system could be, the quality of the performance of your live stream is contingent on connectivity's quality.
To discuss ways to reach the speed that you want to upload your stream there are two words you must be aware of.
The primary term that you need to be conscious of , is your bitrate. This is the speed at which the data is uploaded through the encoder before being sent released to different streaming platforms or alternatives that you've selected. The greater the number of bits per second is the higher streaming quality. A higher bitrate can represent an abundance of data and could cause the stream to slow down.
The trick is to strike an acceptable balance between the bitrate you're using and the speed of the connection. The best way to achieve this is to take into consideration factors such as the frame rate as well as resolution.
What's the framerate and resolution to stream live?
The frame rate of your stream refers to the quantity of images that are sent and then displayed in a second time period which is shown on your monitor. If live streaming for live viewers is available on the web 30 frames each second (FPS) is considered to be standard and is evident that most streaming providers choose to display sixty frames each second in order to provide more clarity in videos or sporting events.
Your resolution is the measurement of your video frame. While everyone wants 4K videos for their televisions and cameras as well as content, that isn't a guarantee that it's the most effective method to stream live. If you're not equipped with adequate capacity to support the volume of files and media, then think about better resolutions such as 1080p or resolutions that are 720p. These will be more easily managed to stream , and maintain the bitrate in an acceptable range.
4. Choose the best platform to live stream
Once you've considered all of the elements involved with live streaming via cameras, encoders and bitrates, it's the time to choose your preferred live streaming service.
Before beginning your broadcasting process, be sure everything is synced and your encoder is correctly connected with streaming keys (or RTMP URL or stream address) across each platform. A majority of these tutorials will outline all the steps that you'll have to go through before broadcasting or simulcasting across several platforms.
- Live with Premium and Enterprise accounts, users can access a variety of live streaming software for videos they upload as well as for the events you host. With Live streaming, Premium accounts come with everything you need to host videos and collaboration software that will help you to manage your processes.
- YouTube Live YouTube Live service is a fundamental service, which is available for free make use of for streaming at a low cost.
- Facebook Live: Facebook Live might be best for those looking to embed live streaming video to their Facebook pages to promote their organization.
- Twitch can be one the top brands for live streaming games. Twitch is one of the top streaming sites due to its followers and unique styles of streamed content.
- Mixer Live streaming on Microsoft's platform makes streams of video games and also rivals Twitch's viewership.
- LinkedIn Live It was just disclosed, LinkedIn now offers its live streaming service specially made to be used for networking and for business reasons.
An ideal platform must be able to accommodate the kind of video content that you are planning to stream and the target audience you want to connect with.
For smaller-scale entrepreneurs, marketing, influencers, or companies who are considering creating live streaming for the first for the first time. It offers a reliable support system, as well as instruments to help you start off in the right method.
Boost your live streaming skills
Do you think of starting your own Live streaming business? Get involved in the Experts Community for comprehensive training about the equipment as well as the software and other essential instruments to set up a perfect Live streaming company.
Five suggestions for optimizing your bandwidth on your Internet connection for streaming live
Check the live stream on your mobile device, web cam or any other external camera prior to the date of the live stream. Additionally, if you're used to using video chats over your phone throughout the day at work, or on your laptop on the couch, there's a chance that your live stream to look similar under similar circumstances.
1. Directly connect to your router at all times.
If you're looking to improve the quality of your streaming, the first step is to connect as quickly as possible. It's as simple as connecting directly to your modem or router on your PC with the Ethernet cable. If you're using an online camera , or digital camera make sure you connect it directly to your laptop instead of making use of WLAN or Bluetooth. It is the most popular method connecting devices that are physically connected through wireless networks. This helps increase the value of your streams.
2. Eliminate all other sources
Similar to the advice given to start out, once you begin, you'll be capable of experimenting with streaming under your typical working environment. One option worth using is to turn off all other devices that could be hindering the speed or connectivity of your Internet. This includes any other computers connected to it and Wi-Fi devices, in addition to background software which are automatically synced or consuming bandwidth.
3. Increase the speed of your upload as well as bandwidth
Whatever location you decide for streaming from, make sure to check your speeds online and also the bandwidth limits set by the Internet service provider (ISP). If you intend streaming live streams on a frequent basis, it is recommended to either upgrade your account or opting for an ISP that can provide the required speed for upload as well as bandwidth.
4. Make a buffer that's appropriate.
Make a buffer to be certain that you're working at a secure rate. It will reduce the rate at which broadcasts are made. One of the most effective guidelines is to ensure that the upload speed at 30% more than your bitrate rate to assure a consistent and smooth broadcast.
5. Test extensively
If you're not certain you're not sure, try it.
Live stream tests will assist you in the search for the ideal place to improve factors like frame resolution, frame rate and bitrate with out viewers. It is important to run many rehearsals and tests to ensure that everything are in line with the requirements of your viewers.
Wrap up: start your live stream today
Live streaming is straightforward. If you can install the correct equipment, it is possible to concentrate on the larger picture. Also, it is all about focus on live stream and making sure you have a perfect aesthetic and style prior to streaming live.
Once you've grasped the fundamental concepts and have mastered the fundamentals, you're ready to start making professional videos of high quality. If you're looking to refresh your knowledge check out our suggestions and tricks that will aid you with getting the elements of your video in the right order.
The post was published on here
This post was posted on here
This post was posted on here