
How to Create an Online Course Website: Step-by-Step Instructions
This step-by step guide will help you discover the procedure of designing a site for an online class in CreativeMindClass the free software utilized by some of the most renowned creators.
How to create an online website for your course in 6 easy steps
Convince your customers to purchase with text and visuals.
A clear, benefit-oriented web site can sell your course for the student. The key is the answer to this inquiry: What makes someone choose your coure instead of another? Present the promise to your customers, so they are aware of what they can expect. The best course websites are typically simple, unique and inspiring. It features attention-grabbing copy as well as illustrations that illustrate the major benefits closed with a clear calling-to-action.
In this guide will teach you the practical method of creating an attractive site with CreativeMindClass. The software lets you continuously present the benefits of your class using text, photos and promotional videos to make a web page that impresses your viewers.
This guide will help you follow these steps.
- Attract the viewer's focus
- Add inspiring visuals
- Start your course
- Highlight benefits
- Offer a sample of the course
- Share it with your followers
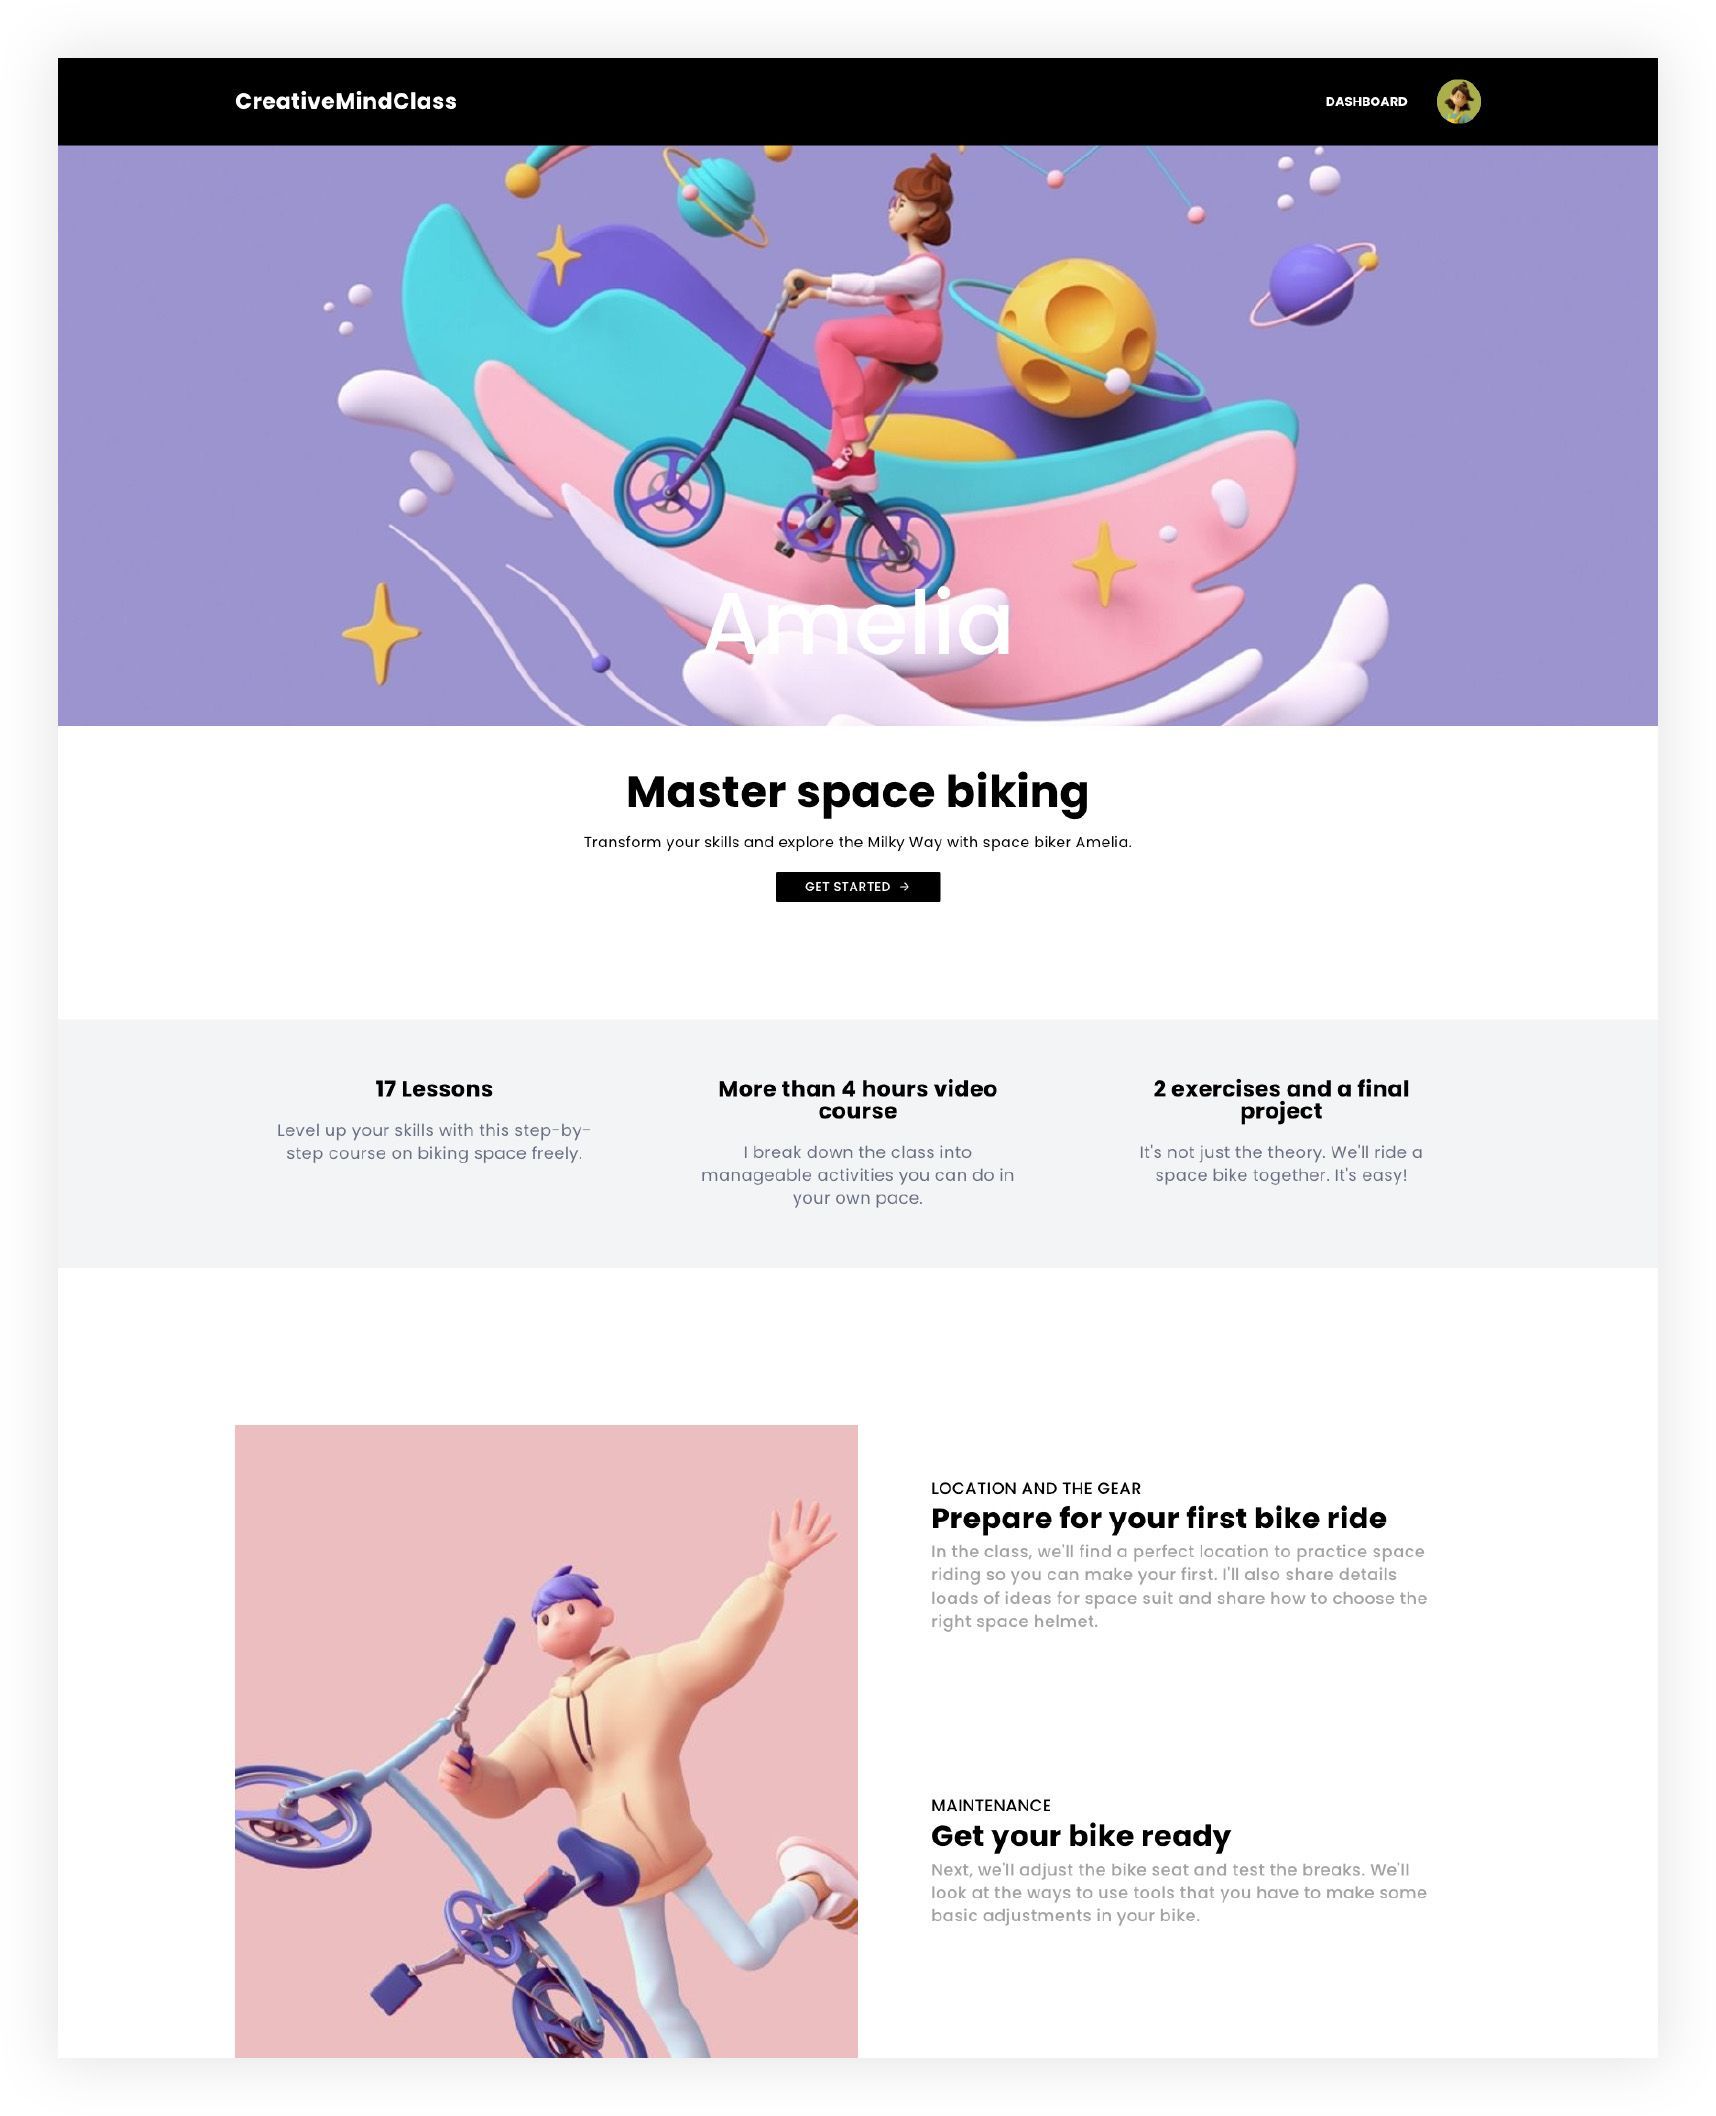
1. Attract the attention of your visitor
On your website, you should get to the point quickly before your potential customer moves on. First thing that they will read is your headline. It clearly states the benefit of the course, and also explains what a visitor will get.
Make sure it's short, sharp and concise. The most effective way to ensure that the headline is short is to create a supportive headline. It can be the end of the headline phrase or an additional sentence supporting the primary statement.
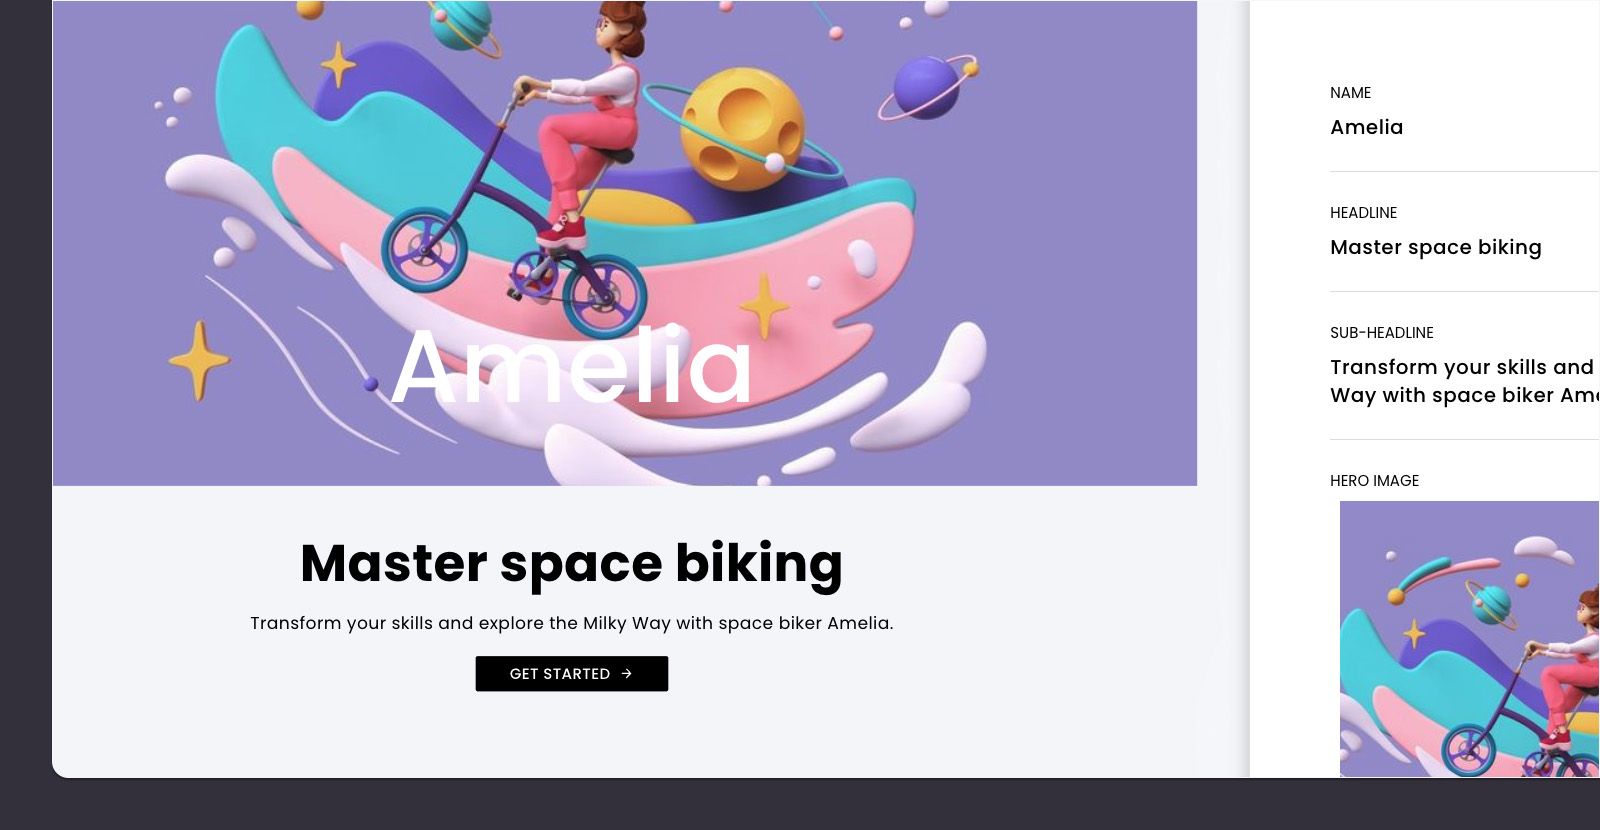
What is it? in CreativeMindClass
- Click on Edit button on the Welcome section.
- Write Headline.
- Type SUB-HEADLINE.
2. Add inspiring visuals
Make sure that your readers are aware of the offer through the hero picture (or background footage) placed on the top part of your web page. What does this hero image say about the benefits of your online class? Imagine your prospective customer into a situation you've created to help your audience. Your images should be big as well as crisp and clear.
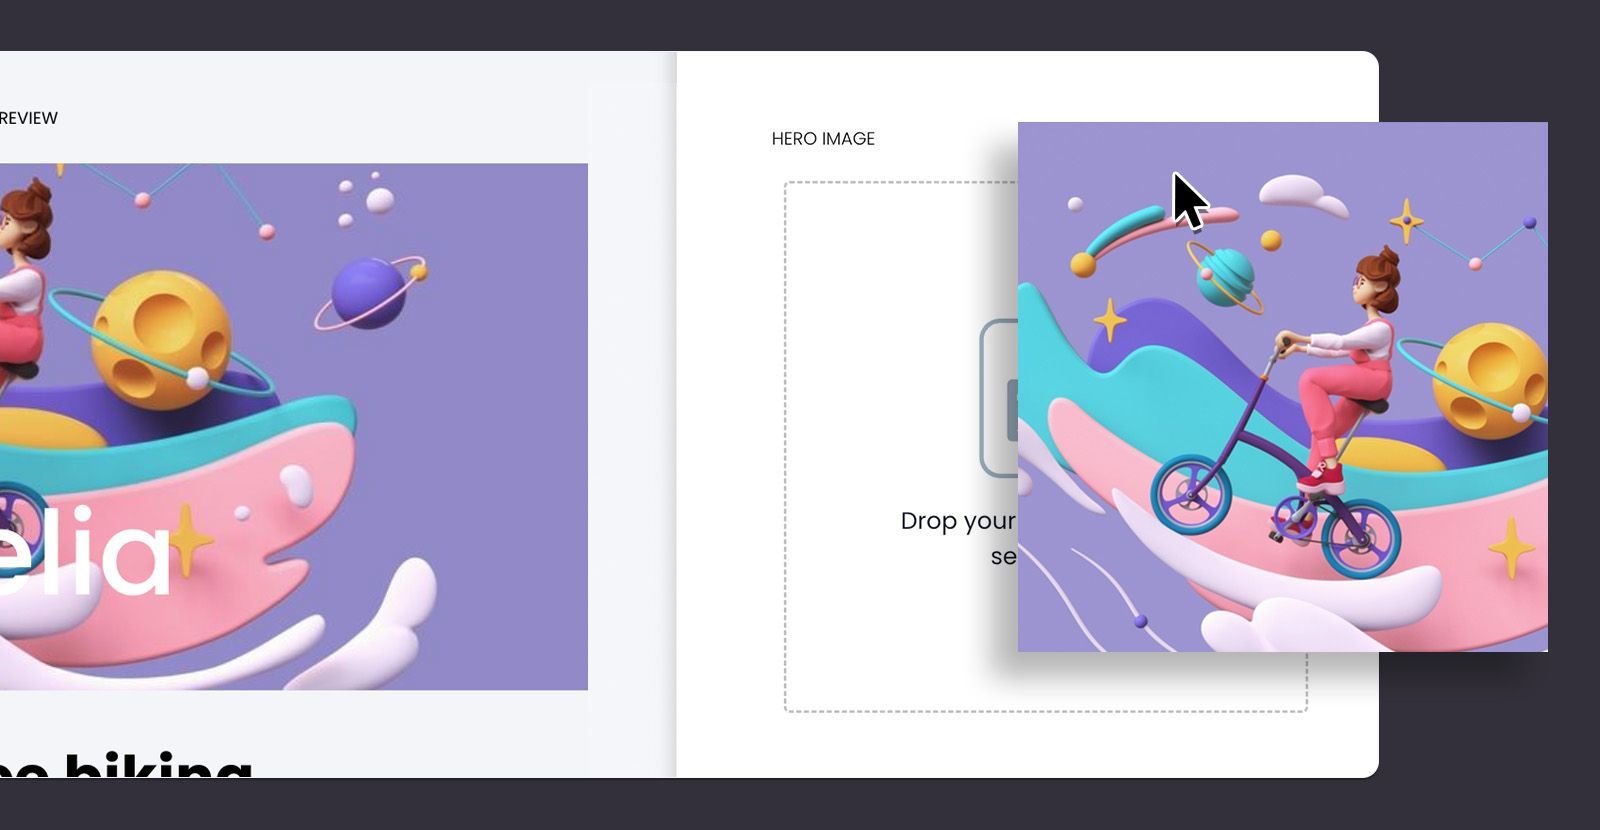
What is it? within CreativeMindClass
- Click on Edit button on the Welcome section.
- Click HERO Image, BACKGROUND VIDEO or an animationto add your visuals.
3. Present your course
Provide a few basic details about the online course you are offering. What is it? What is the duration? How many classes do you offer? Are you able to give bonus items? What is the course's project? Who will the course be for? It helps people who visit your page quickly understand the product they're purchasing.
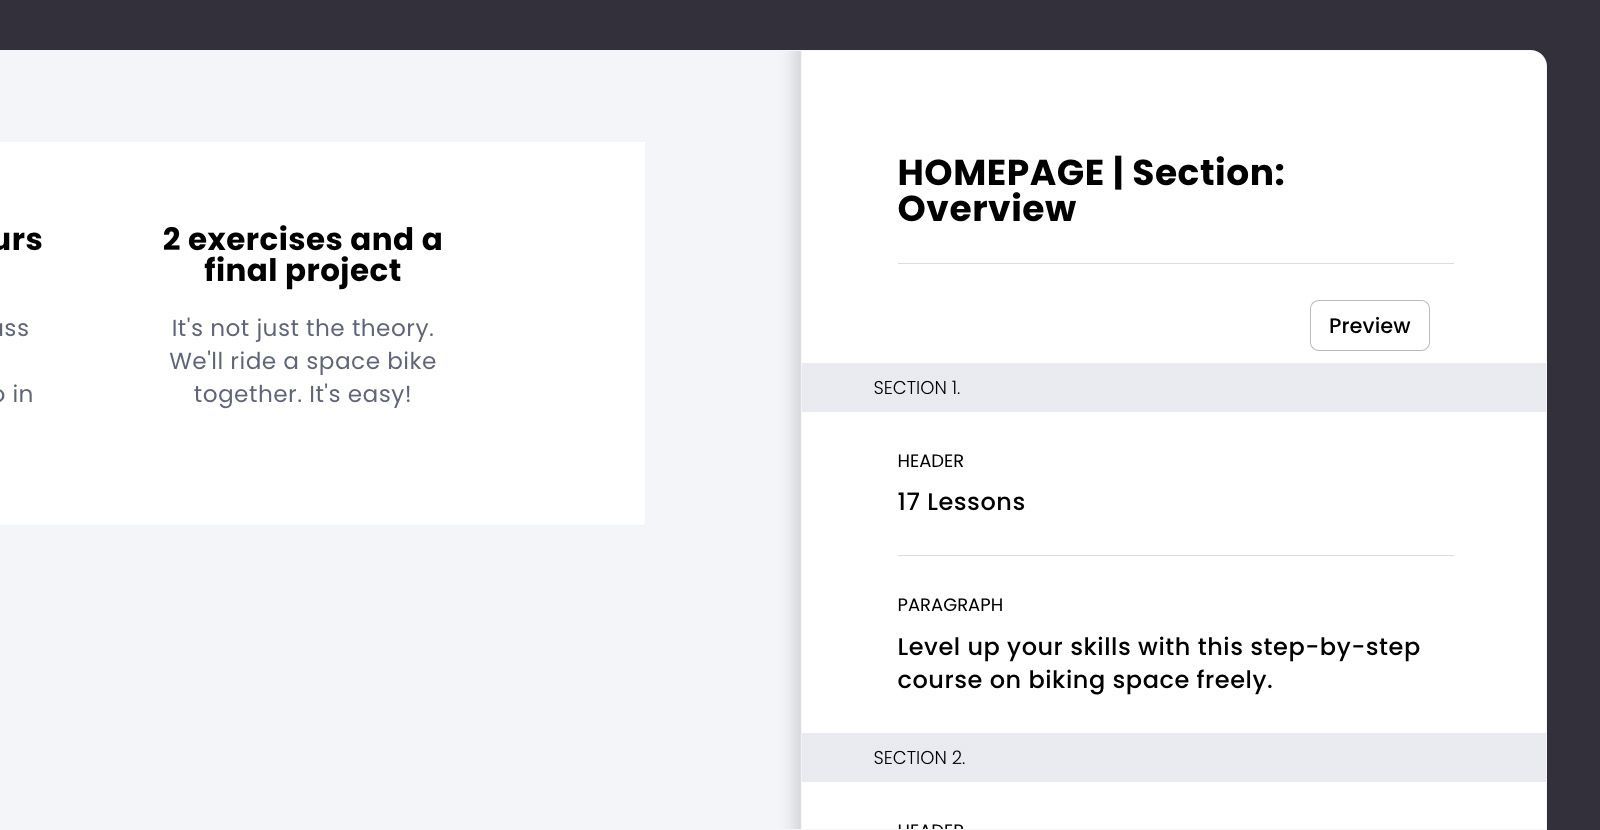
What is it? within CreativeMindClass
- Click the Edit button located in the Overview section.
- Type Header.
- Type PARAGRAPH.
4. Highlight benefits
The benefits clearly stated will convince the majority of individuals. Provide additional details about the benefits of the learning process and their worth. What will the students acquire? How would the course benefit them? What are the changes they will go through? What are the most painful problems you can resolve?
A simple way to draw attention to benefits is to write an easy and concise header. Add a second subheader that supports the principal claim. In the paragraphs, write about the key Learning outcomes and then describe shortly the value you're providing.
Another way to highlight the positive aspects of your program is to use an eye-catching photograph.
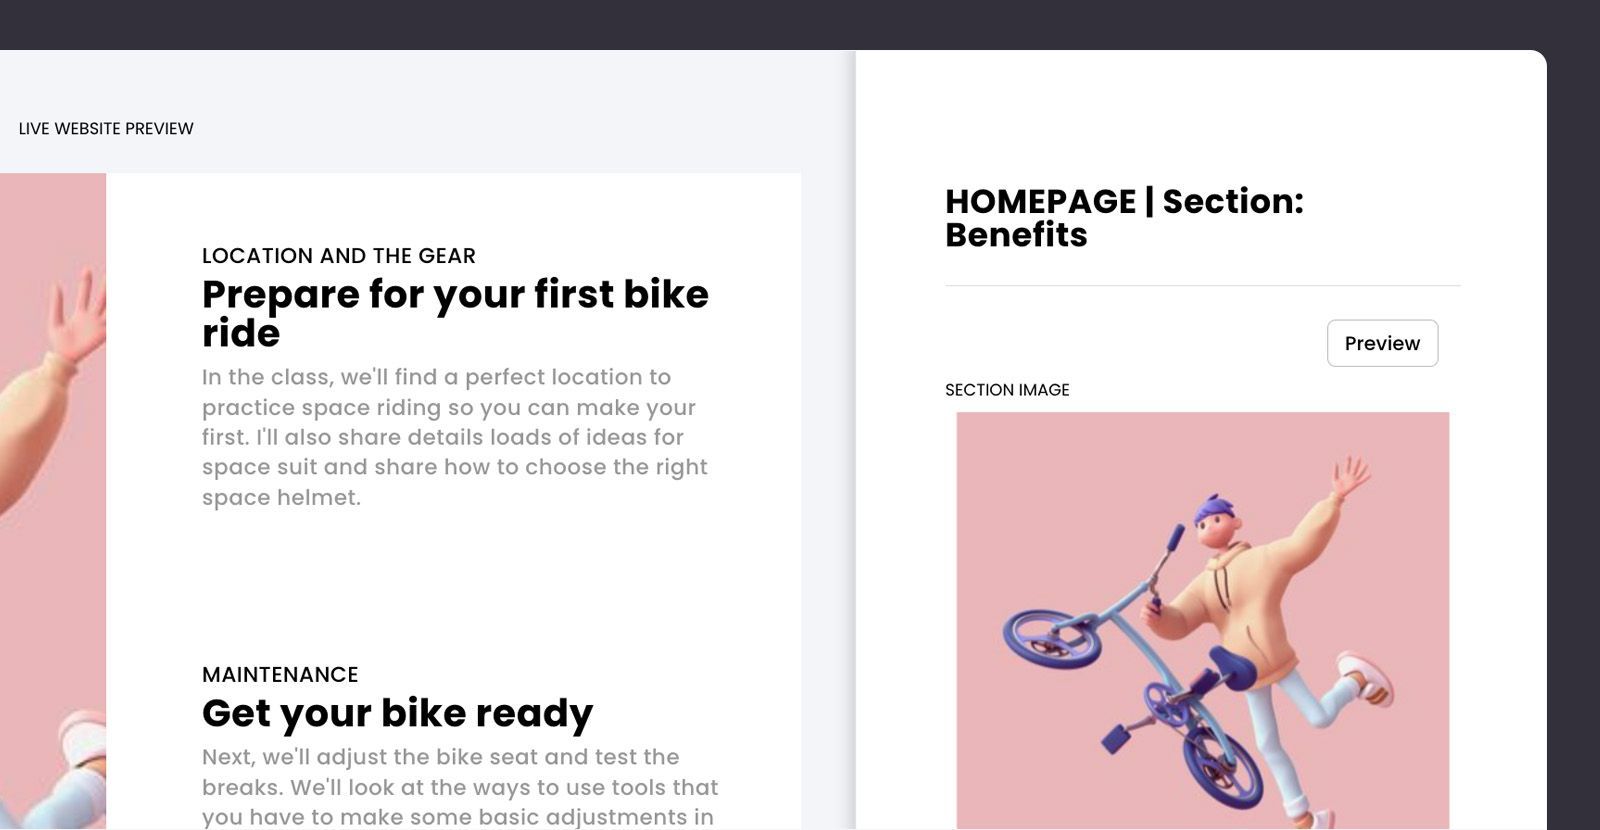
How to do it in CreativeMindClass
- Click Edit button in the the Benefits section.
- Type HEADER.
- The type is SUB-HEADER.
- Write PARAGRAPH.
- Click SECTION IMAGEand upload your photo.
Pro Tip: Concentrate on the three primary benefits. The copy should be short and simple to keep readers' attention. Removing anything that's hard to follow.
5. Give a taste of your course
Someone who is considering buying your online course would like to take a peek peek of what's inside. You can present what your course is about in an engaging promo trailer. In order to create a promo trailer you could create an engaging video with a duration of between 30-60 minutes.
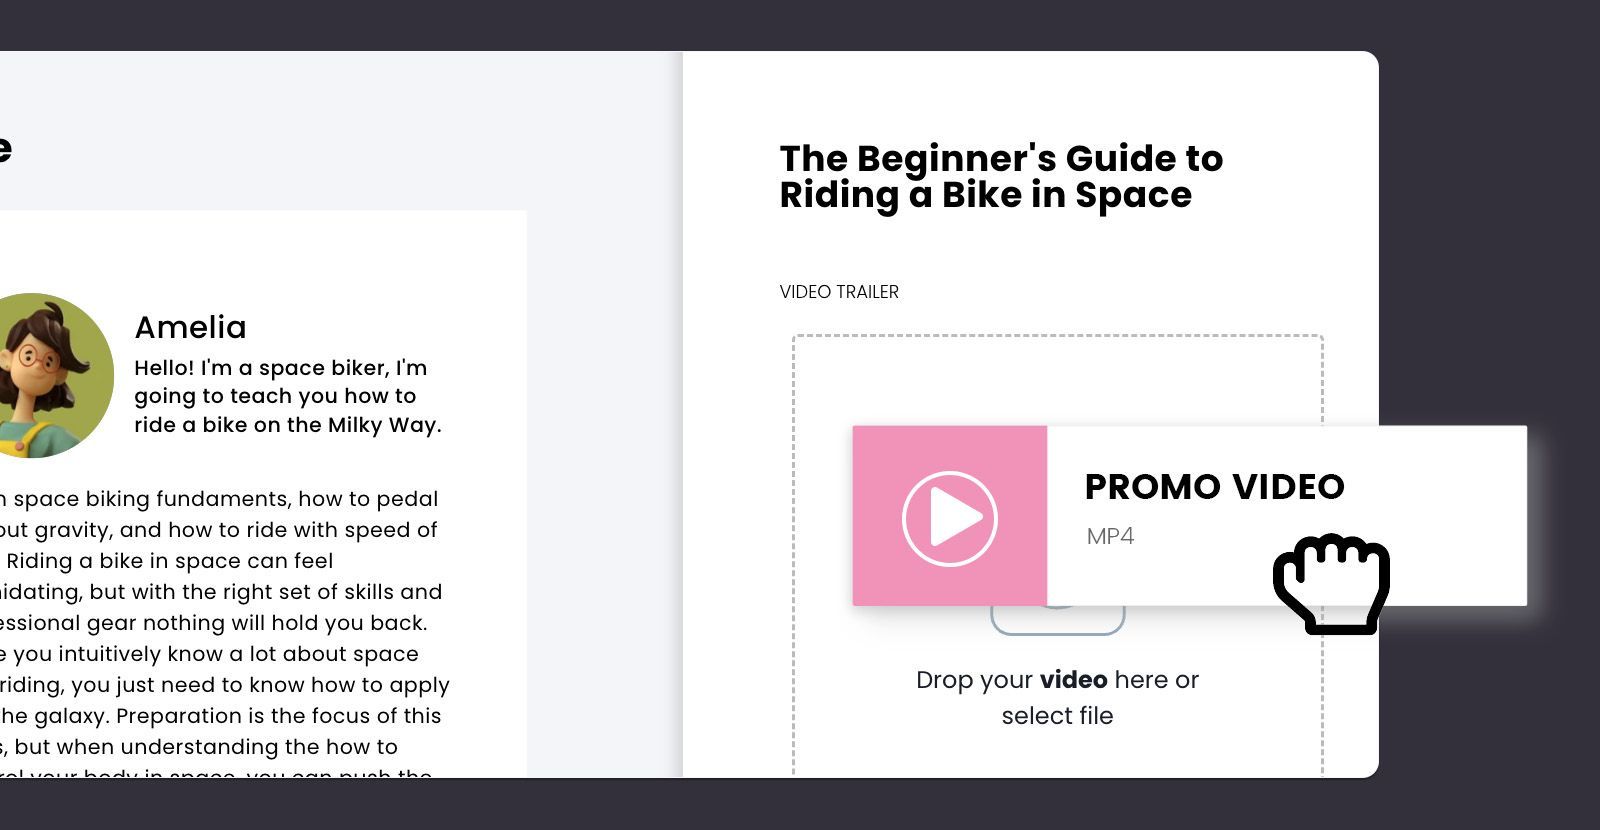
How do I get it in CreativeMindClass
- Click My Classin main menu to open it.
- In class, click the on the class page tab to open it.
- Click VIDEO TRAINERto upload your promo video.
6. Send it to your followers
Congratulations! Once you've prepared the course's website, your online course creation has been completed. This is a thrilling moment after all the effort.
But another type of work starts! It's time to share it with your audience. Add the link on your website as well as social media, emailor blog and begin your promotional campaign.
PRO TIP: Before your share the course with your audience, make sure that all lessons and exercises are published.
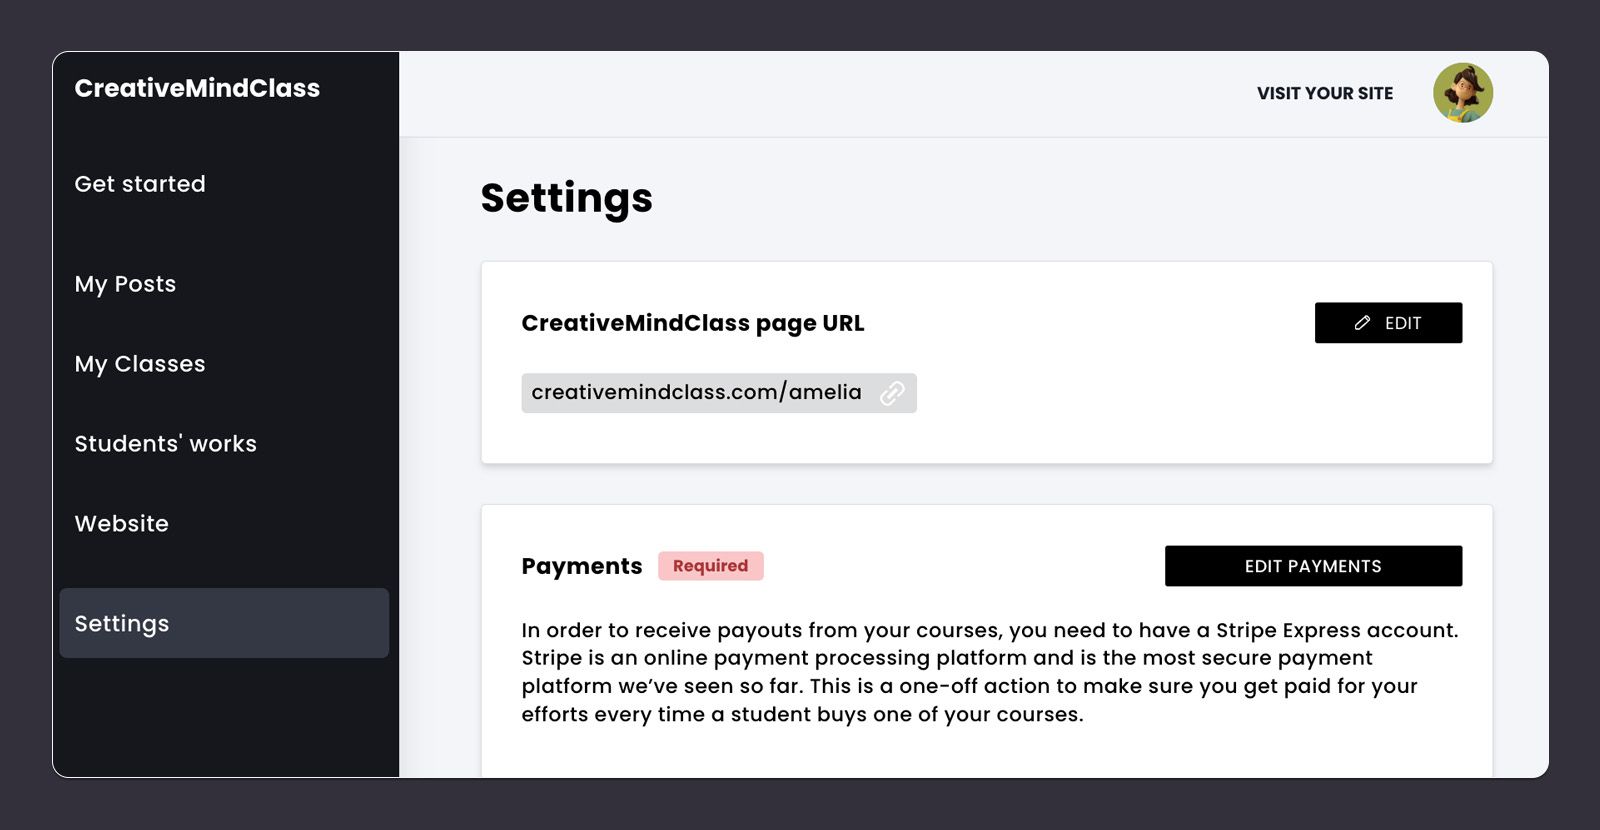
What is it? in CreativeMindClass
- Click Settingsin the main menu, then click Settings to open it.
- Copy the CreativeMindClass Page URL.
- You can share your course with the audience.
And you're done!
When your site has been completed, you will can use it for promoting your online course. If you're starting an online course today, you can use the no-cost template to build your own website. You can also take a look at our comprehensive guide for creating the perfect online online learning course.
Make your site for your online class. Today.
Start for free with CreativeMindClass's easy-to-use template.
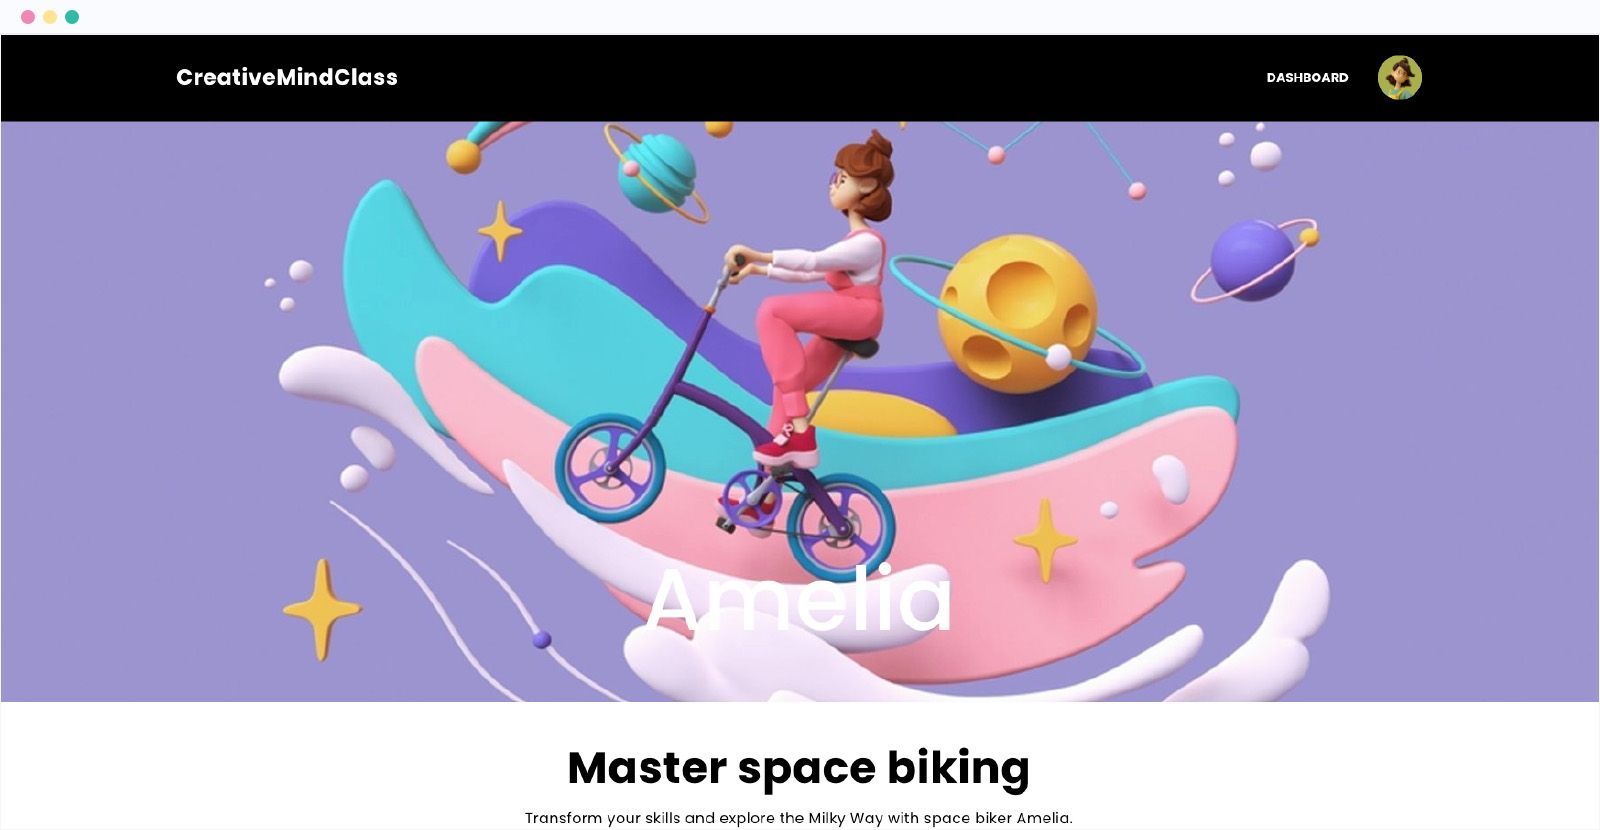
Join for free and there is no limit on time
This post was first seen on here